How to setup game streaming (OBS?)

- I. Background
- II. Installation
- III. The First Time Wizard
- IV. Customize a simple scene
- V. Protect Your Privacy – Streaming delay
- VI. Conclusion
I. Background
As a gamer, I think the most fun part of playing games is to enjoy the time with friends. Sometimes it doesn’t matter how good you are. To me, having someone to create good memories, is the best part of playing video games, which brings me to the world of streaming, to share the joy with others.
When I started to learn how to setup my own streaming channel, I realized it wasn’t as easy as I imagined. If you are not familiar with computer system or decent amount of computer network knowledge, it may be difficult to get started with.
In this article, you will learn how to setup your own streaming environment, specifically, with OBS Studio and your Twitch account. This is a step-by-step tutorial that covers how to install OBS Studio, link your Twitch account, and setup your first streaming scene with a basic game window and webcam.
Before we get in to the details, one thing to highlight is the importance to protect your privacy while streaming. There have been many embarrassing and awkward moments, like accidentally open URLs to porn site, which may lead to an account ban, nude before webcam, etc. You’ll learn how to setup Streaming Delay in OBS, and how-to setup quick key for stopping streaming (just in case!)
II. Installation
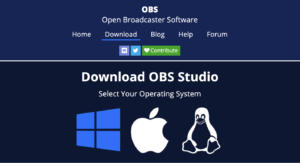
The first step is to download OBS Studio. (Note: I am using Windows 10 for this tutorial.) Choose the one fit your operation system, then click Download Installer. Once the download is completed, remember to perform a virus scan before opening the installer.
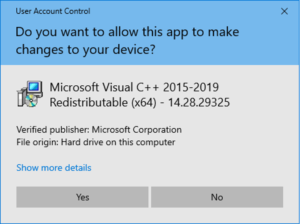
Upon completion of virus scan, open the installer. You’ll see a windows UAC that asks you to verify the publisher. If you see a prompt that says publisher cannot be verified, you should stop the installation process, and check your download source. Make sure to download the installer from official website.

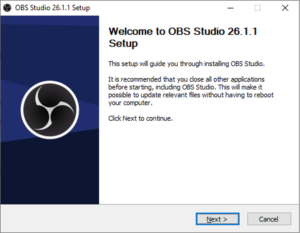
Now, you should see the first screen of the installer. Click Next to continue.
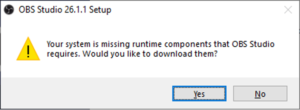
If you haven’t installed required component for OBS Studio, you will see a popup like the image below. Click Yes, and the installer will bring you to the OBS website. Be sure to double check the website when any application guides you to download software or perform account sign in.
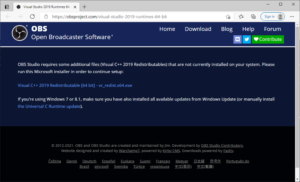
Once the download is completed, it’s crucial to check the installer with antivirus software and verify the publisher. You don’t want to get your computer ransomed by hackers.
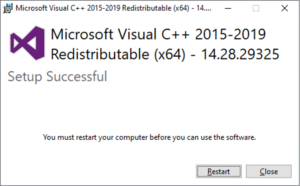
Please note that computer reboot is required after installation. Remember to save any unsaved changes before you click Restart.
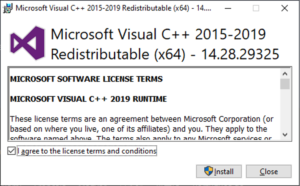
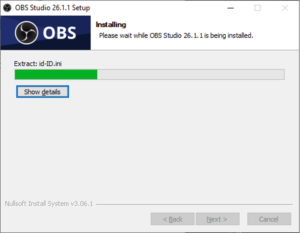
Now that all the necessary components are ready, let’s open the installer again. This time when you press Next, you will see the license info you always agree to.
Rule of thumb is to carefully read through the checkboxes before clicking Next button. Some shareware may ask you to install unwanted adwares that are usually default opt-in. You don’t want that on your computer!
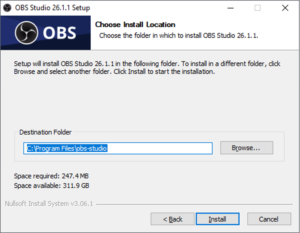
Now, we have moved on to installation location. If you don’t have preference, just click Install and continue.
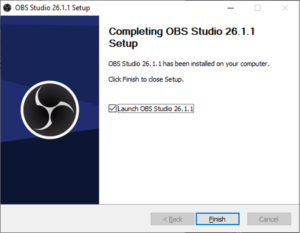
Congratulations! Now we are all set for the required software.
In next section, I’ll walk you through the first time running wizard of OBS Studio. There might be some terms you are not familiar with, but the concept is quite easy.
III. The First Time Wizard
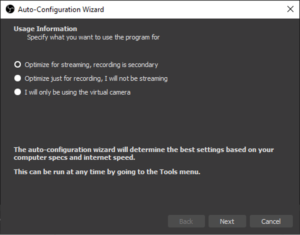
When you first open OBS Studio, there will be an auto-configuration wizard to help you complete the basic environment setup.
The first page is about purpose of your program usage. The software may use different strategy to process your video accordingly. Here, we choose first option (for streaming) and press Next.
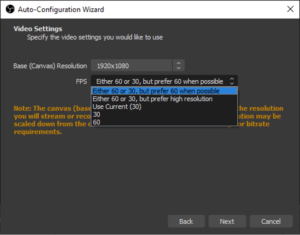
Video settings are related to your Internet bandwidth (uploading), and the ability of your computer to process the video and audio input for streaming or recording. If you are not sure which is the best option for you, just go with the default option for now. You can always adjust the resolution and FPS afterwards.
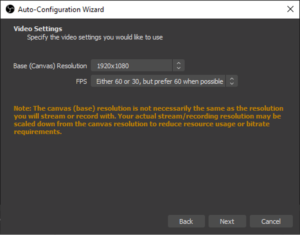
For example, you can check your Twitch channel on another device to see if it runs smoothly. If it’s not, you can try to decrease the resolution or frame rate to figure out the best experience for your audience. For more detail, you can check Twitch’s Broadcasting Guidelines, which provide an overview of bandwidth requirements for different FPS and resolutions.
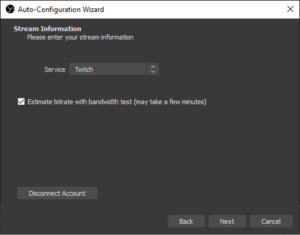
Stream Information is where we choose the streaming platform. In this tutorial, we use Twitch as example. There are two options to link with your account. We used so called Stream Key directly to communicate with Twitch server. It is a special passcode that allows anyone to perform action on behalf of your identity. If you choose to link this way, remember to keep your Stream Key safe and renew it periodically.
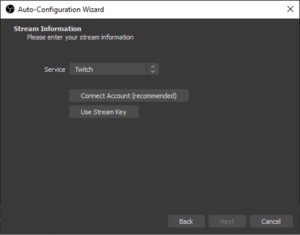
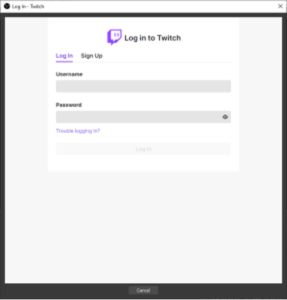
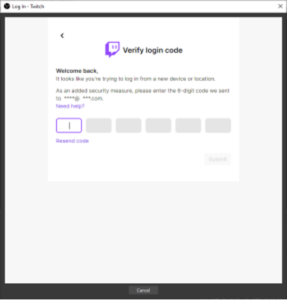
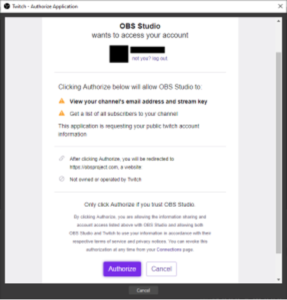
Alternatively, Connect Account can authorize your account, password and two-factor authenticator. This is also the recommended option by OBS Studio. Enter your user name password, and verify the login code sent to your email. Once you are verified, you will be asked to authorize OBS Studio to view your stream key, email, and subscriber of you channel.
We are almost there! If you want to test best resolution and fps for your environment automatically, press Next and check the results.
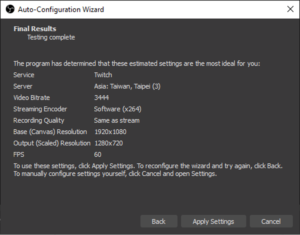
Finally, this is the test results. If you are good with the result, simply press Apply Settings to end the wizard. Remember, you can come back and run the auto configuration wizard any time.
IV. Customize a simple scene
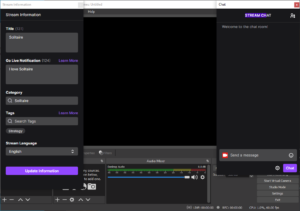
Before we start to configure the streaming scene. Let’s talk about the docks for Twitch.
Stream Information is for your audience. Setup the title of your channel, and greetings for your follower when you go live. Pick a suitable category for your channel, because this will make it easier for audience with same interests to find you.
STREAM CHAT is where you can see the chat room for your channel, and reply to the audience while streaming.
If you close these docks accidentally, don’t worry, they can be found under View > Docks.
Remember to update your channel title before start streaming. Past streaming clips will be named after the title you went live.
Let’s move on to the next section.
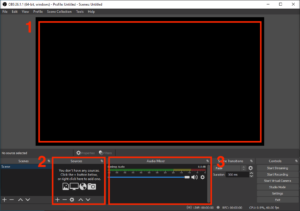
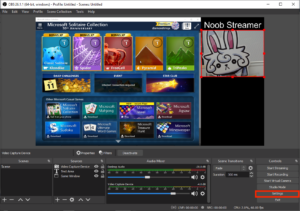
The image below shows three main working area you should know:
#1 is the screen your audience will see. You can add anything to this area, move, scale and relocate those visible sources.
#2 is the content source. You can add image, video (like your whole screen, or one of the application windows), audio (your microphone, or other line-in source), text, etc. Once a source has been added, it will be visible on #1 or #3 depending on the media type. (For example, a webcam usually has both video and audio.)
#3 is all the audio mixer. You can control the balance of each audio input, or mute specific source.
These options are adjustable on the flight. If your audience complains about the balance of your audio, you and adjust the audio mixer during your streaming.
Let’s try adding a gaming window to the screen. Press + in sources and select Window Capture.
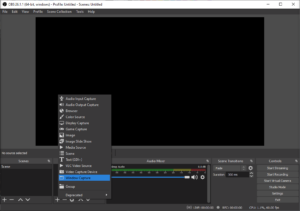
Name your source and press ok. Please note that you can also add a window with voice only if you uncheck “Make source visible.”
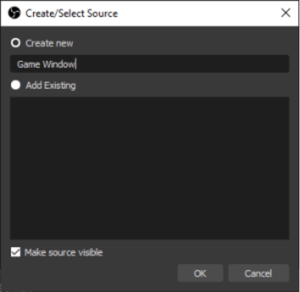
Next, in Window we select our gaming window. Press OK and finish the setting.
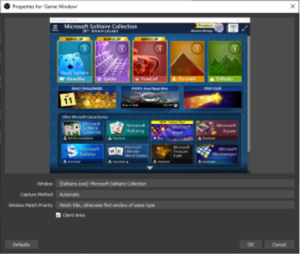
Now our gaming window is visible on the screen. If you noticed the red rectangle on the screen, that means you can move and resize it freely. In this example, we have added a gaming window to the screen. Make sure there’s no sensitive information in the video sources, especially when you decide to broadcast the whole screen. You may accidentally reveal your friends’ real name on screen if you forget to close IMs.
If you would like to do streaming with a webcam, press + and choose Video Capture Device. Press device drop down and select your webcam. In this example, it’s HD Pro Webcam C920. Press OK when you finish the source setting.
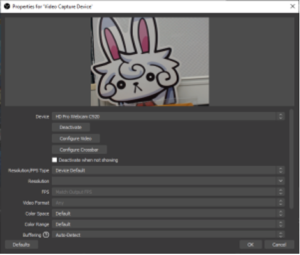
Now, we have a gaming window and a webcam on the screen.
If you noticed the Audio Mixer, there is a Video Capture Device added to the list. If you’d rather use your microphone instead of the built-in one from webcam, you can mute the source, and add another audio source.
Once we are all set, you can press Start Streaming. Your channel will go live immediately. Before you go live, there’s one more thing you should be aware, which we’ve expressed many times in the past – always remember to protect your privacy.
In next section we’ll demonstrate how to setup streaming delay.
V. Protect Your Privacy – Streaming delay
Streaming Delay is a preset delay before your audience sees your streaming content. This means for example, your audience will see what happened 30 seconds after your channel go live. Should embarrassing ‘accidents’ occur during your live streaming, you can drop these 30 seconds of video before your audience sees them. You can find this at settings page.
Press Advanced in left panel, you’ll find Stream Delay at the fourth place.
Once you enable streaming delay, extra memory will be used to keep buffered streaming content. The memory usage may vary depends on your FPS and resolution.
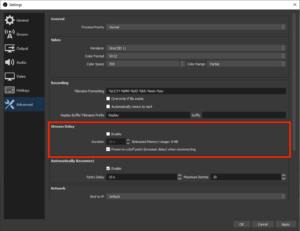
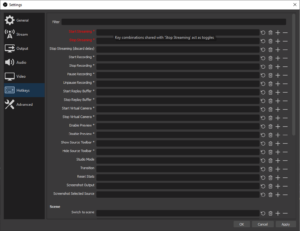
Finally, in case if you’re afraid you cannot find the Stop Streaming button in time. Setup a Hotkey for emergency.
VI. Conclusion
In this article, we showed you how to install OBS Studio, and setup your basic streaming scene. Before we let you go, it’s crucial to recap some security and privacy check points you may need to be careful while setting up your streaming environment:
- Only download software from the official site. Be sure to scan it with antivirus software.
- Verify publisher of the installer. Do not allow any unknown publisher to modify your device.
- Check sensitive data on every video source before you go live. Add windows instead of screens (unless you find it necessary.)
- Setup Streaming Delay in case embarrassing accidents happened.
- Setup a hotkey to stop your streaming.
Happy Streaming!
